使用 Apache 反向代理并自动启用 HTTPS 的通用教程
本教程适用于希望使用 Apache 反向代理本地服务,并通过 Let’s Encrypt 自动申请 SSL 证书,实现 HTTPS 访问。
1. 配置 DNS 解析
在你的 DNS 服务商(如 Cloudflare、阿里云、腾讯云等)添加 A 记录,使域名解析到服务器的公网 IP。
示例:
- 域名:
example.com - 记录类型:
A - 值:
服务器公网 IP
确认解析生效后,可以使用 ping example.com 验证是否解析成功。
2. 安装 Apache 和 Certbot
在服务器上安装 Apache 和 Certbot(Let’s Encrypt 客户端):
sudo apt update && sudo apt install -y apache2 certbot python3-certbot-apache
安装完成后,启用 Apache 的必要模块:
sudo a2enmod rewrite proxy proxy_http ssl headers
sudo systemctl restart apache2
3. 配置 Apache 反向代理(先不启用 HTTPS 跳转)
创建 Apache 虚拟主机配置文件,例如 example.com.conf。
sudo vim /etc/apache2/sites-available/example.com.conf
添加以下内容(先不做 HTTPS 跳转):
<VirtualHost *:80>
    ServerName example.com

    RewriteEngine On
    # 重定向所有请求到 HTTPS
    RewriteRule ^ https://%{HTTP_HOST}%{REQUEST_URI} [L,R=301]

    ErrorLog ${APACHE_LOG_DIR}/example.com-error.log
    CustomLog ${APACHE_LOG_DIR}/example.com-access.log combined
</VirtualHost>
4. 启用配置并申请 SSL 证书
运行以下命令以启用该站点配置:
sudo a2ensite example.com.conf
sudo systemctl reload apache2
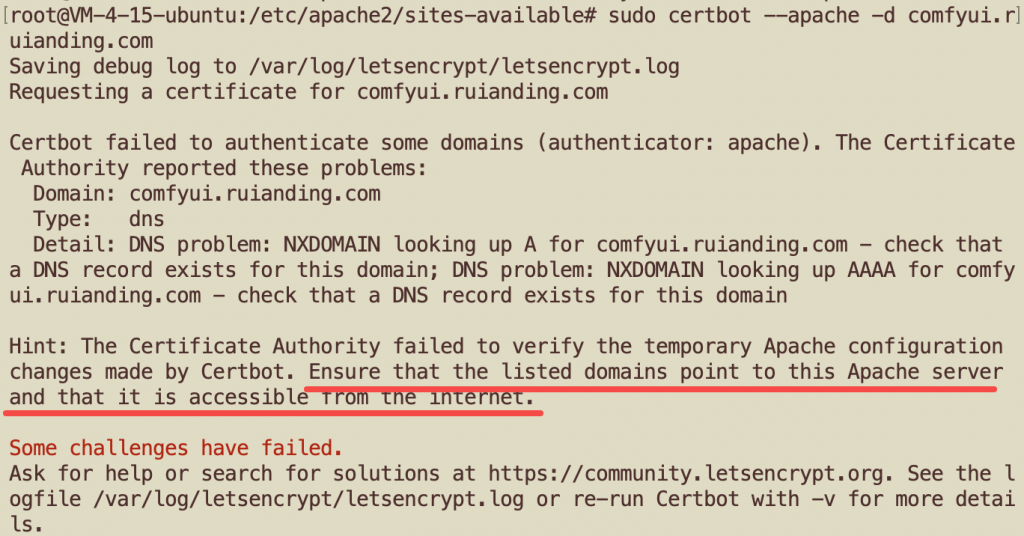
然后使用 Certbot 申请 Let’s Encrypt 证书:
sudo certbot --apache -d example.com
按照提示完成证书申请,并让 Certbot 自动配置 SSL。
请确保带配置的域名能正常指向我们正在进行配置的Apache服务器:
5. 配置 HTTPS 和反向代理
修改 example.com.conf 配置文件,添加 HTTPS 配置。
sudo vim /etc/apache2/sites-available/example.com.conf
更新内容如下:
<VirtualHost *:80>
    ServerName example.com

    RewriteEngine On
    # 重定向所有请求到 HTTPS
    RewriteRule ^ https://%{HTTP_HOST}%{REQUEST_URI} [L,R=301]

    ErrorLog ${APACHE_LOG_DIR}/example.com-error.log
    CustomLog ${APACHE_LOG_DIR}/example.com-access.log combined
</VirtualHost>

<VirtualHost *:443>
    ServerName example.com

    SSLEngine on
    SSLCertificateFile /etc/letsencrypt/live/example.com/fullchain.pem
    SSLCertificateKeyFile /etc/letsencrypt/live/example.com/privkey.pem

    ProxyPreserveHost On

    # 开启重写模块处理 WebSocket 升级
    RewriteEngine On
    RewriteCond %{HTTP:Upgrade} =websocket [NC]
    RewriteRule /(.*) ws://127.0.0.1:app_port/$1 [P,L]

    # HTTP 正常流量反向代理到后端
    ProxyPass / http://127.0.0.1:app_port/
    ProxyPassReverse / http://127.0.0.1:app_port/

    ErrorLog ${APACHE_LOG_DIR}/example.com-error.log
    CustomLog ${APACHE_LOG_DIR}/example.com-access.log combined
</VirtualHost>
6. 重新启用站点并重启 Apache
sudo a2ensite example.com.conf
sudo systemctl restart apache2
7. 配置自动续期
Let’s Encrypt 证书默认有效期为 90 天,可以使用以下命令测试自动续期功能:
sudo certbot renew --dry-run
如果没有错误,则 Certbot 会自动续期证书。
8. 测试反向代理
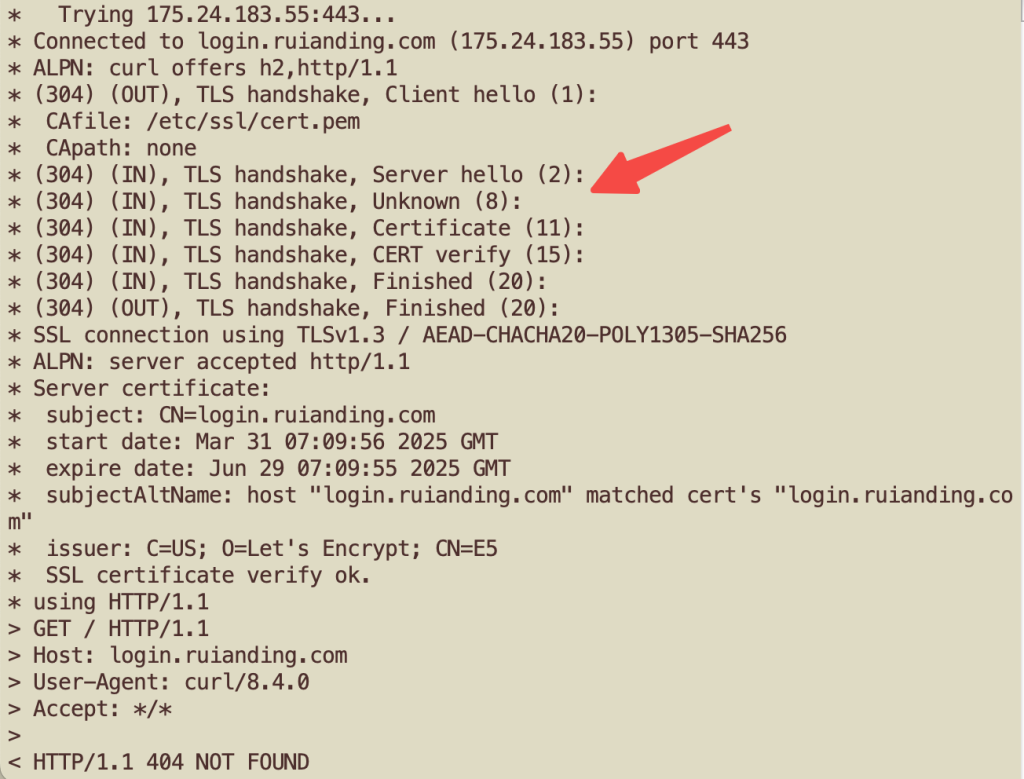
可以使用 curl 测试反向代理是否正常工作:
curl -v https://example.com
如果返回的是后端 127.0.0.1:your_port 提供的服务内容,则配置成功。
在配置 Apache 反向代理时,我遇到了一个非常典型的疑难杂症:我的 VirtualHost 配置正确,后端网页服务在 127.0.0.1:37360 上也正常运行(尤其是在我的 frps 代理环境下,这个端口被转发),但访问域名时,Apache 却一直展示默认页面。
我排除了配置冲突和连接问题后,意识到 Apache 正在默默地忽略我的 ProxyPass 指令,并回退执行该 VirtualHost 继承的默认 DocumentRoot。最终,我将标准的 ProxyPass / 替换成了基于正则表达式的 ProxyPassMatch ^/(.*)$。这个改变立即解决了问题。我的怀疑是,在像 frps 这种复杂的转发和多 VirtualHost 环境中,ProxyPassMatch 的优先级或解析方式高于简单的 ProxyPass,从而确保了代理指令被 Apache 强制执行,避免了配置被意外覆盖或忽略。
    # HTTP 正常流量反向代理到后端
ProxyPassMatch ^/(.*)$ http://127.0.0.1:37360/$1
ProxyPassReverse / http://127.0.0.1:37360/